Over 1.8 million UK homes now have solar panels, and the process is far simpler than most people expect. With Emerald Solar's all-inclusive model, you don't need to organise a single thing: from the initial survey to the moment your system goes live, everything is managed for you. This guide walks you through every stage of the process so you know exactly what to expect before you commit to anything.
1. What Does Solar Panel Installation Involve?
Solar panel installation is a complete end-to-end process, not just fitting panels to a roof. It covers a site survey and custom system design, DNO grid application, equipment supply, physical installation, grid connection, monitoring setup, and long-term aftercare.
With Emerald Solar, the homeowner does not need to organise anything independently. We manage the entire process, start to finish. You get a confirmed installation date, a monitoring app ready to use on the day, and a generating system before the engineers leave.
MCS certification: why it matters
Every Emerald Solar installation is MCS-certified (Microgeneration Certification Scheme), the UK's government-backed quality standard for small-scale renewables. MCS certification means:
- Your installation meets recognised UK safety and performance standards
- Your panels and inverter are on the MCS approved products list
- You are eligible to register for Smart Export Guarantee (SEG) payments. Without MCS certification, you cannot be paid for the electricity you export to the grid
- Your manufacturer warranties are valid, as most panel brands require MCS-certified installation
EPVS validation: not marketing claims
Before you commit, your system design is independently validated by EPVS (Energy Performance Validation Scheme). This means the projected generation and savings figures you are shown are verified for your specific roof, location, and usage, not generic national averages.
£0 upfront option
You also have access to Emerald Solar's £0 upfront Solar Plan through Hometree Finance, more on that in Step 3 below.
2. The Solar Panel Installation Process: Step by Step
Step 1: Free Home Survey & Custom System Design
Everything begins with a free survey, no commitment required. An energy specialist assesses your roof for orientation, pitch, shading, and structural suitability. They use this data to design a system tailored to your property and energy usage: panel brand, inverter type, system size (kW), and optional battery storage.
Your design is then submitted to EPVS for independent validation. The savings estimate you receive is not a marketing figure; it is independently verified for your specific roof and location. You can review everything before deciding.
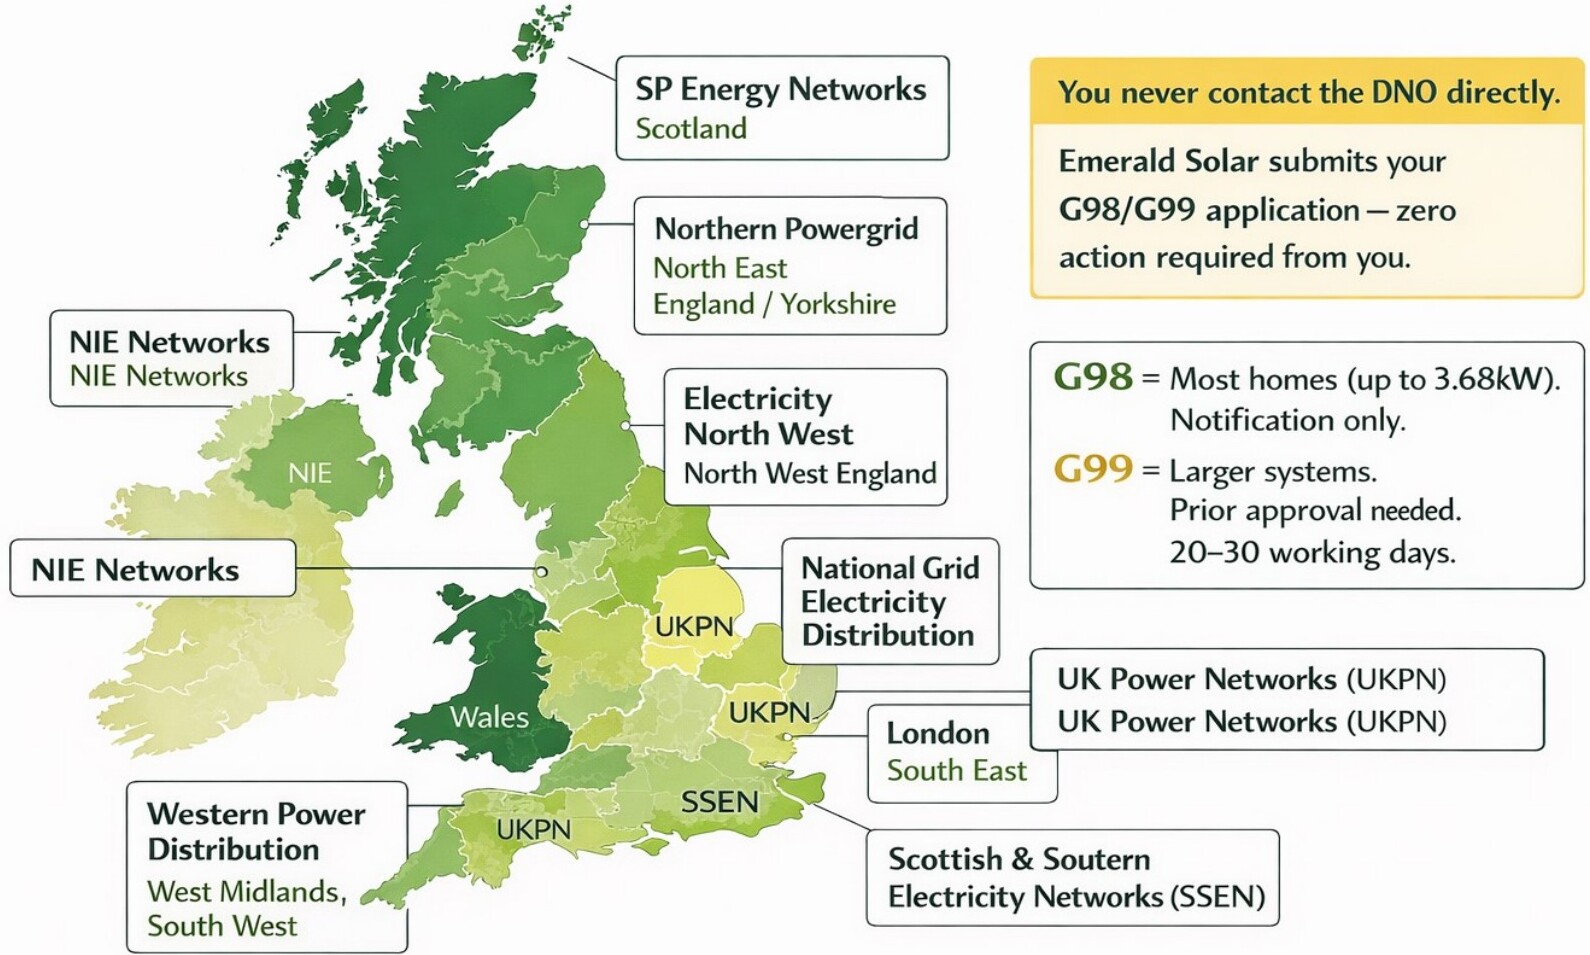
Step 2: DNO Application (Handled by Emerald Solar)
Your Distribution Network Operator (DNO) is the regional company that manages the electricity grid infrastructure in your area, not your energy supplier. Every solar installation must be notified to the local DNO before the system can export electricity to the grid.
Emerald Solar handles the entire DNO process on your behalf. For most residential systems (up to 3.68kW), this is a G98 notification, no approval needed, just a formal notification. For larger systems, a G99 application with prior approval is required, which typically takes 20–30 working days. Either way, you do not need to contact your DNO or take any action.
Step 3: Finance Approval (The Solar Plan with Hometree Finance)
If you choose The Solar Plan, your finance application is processed by Hometree Finance, an FCA-authorised lender. The online application takes approximately 2 minutes and provides an instant decision. There is no deposit and no upfront cost.
- No deposit. No upfront payment.
- No credit score impact during the initial check.
- Monthly payments designed to be offset by your energy bill savings, cost-neutral from day one for many customers.
Finance is subject to status. Monthly payments are subject to a 2.5% annual increase.
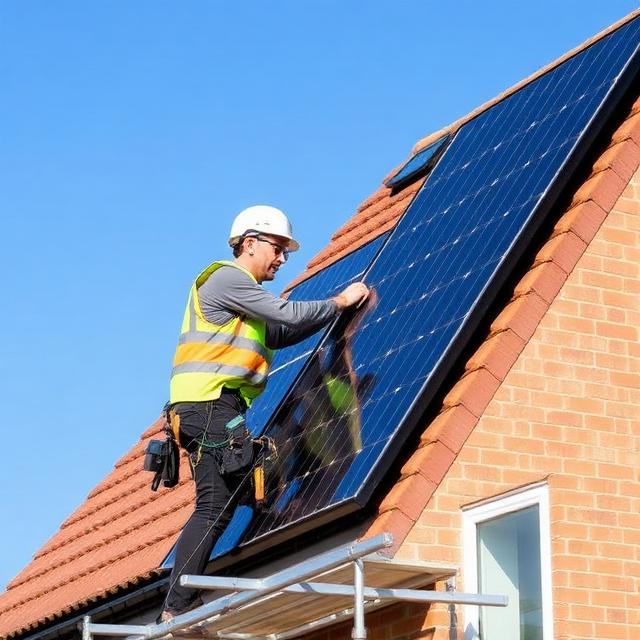
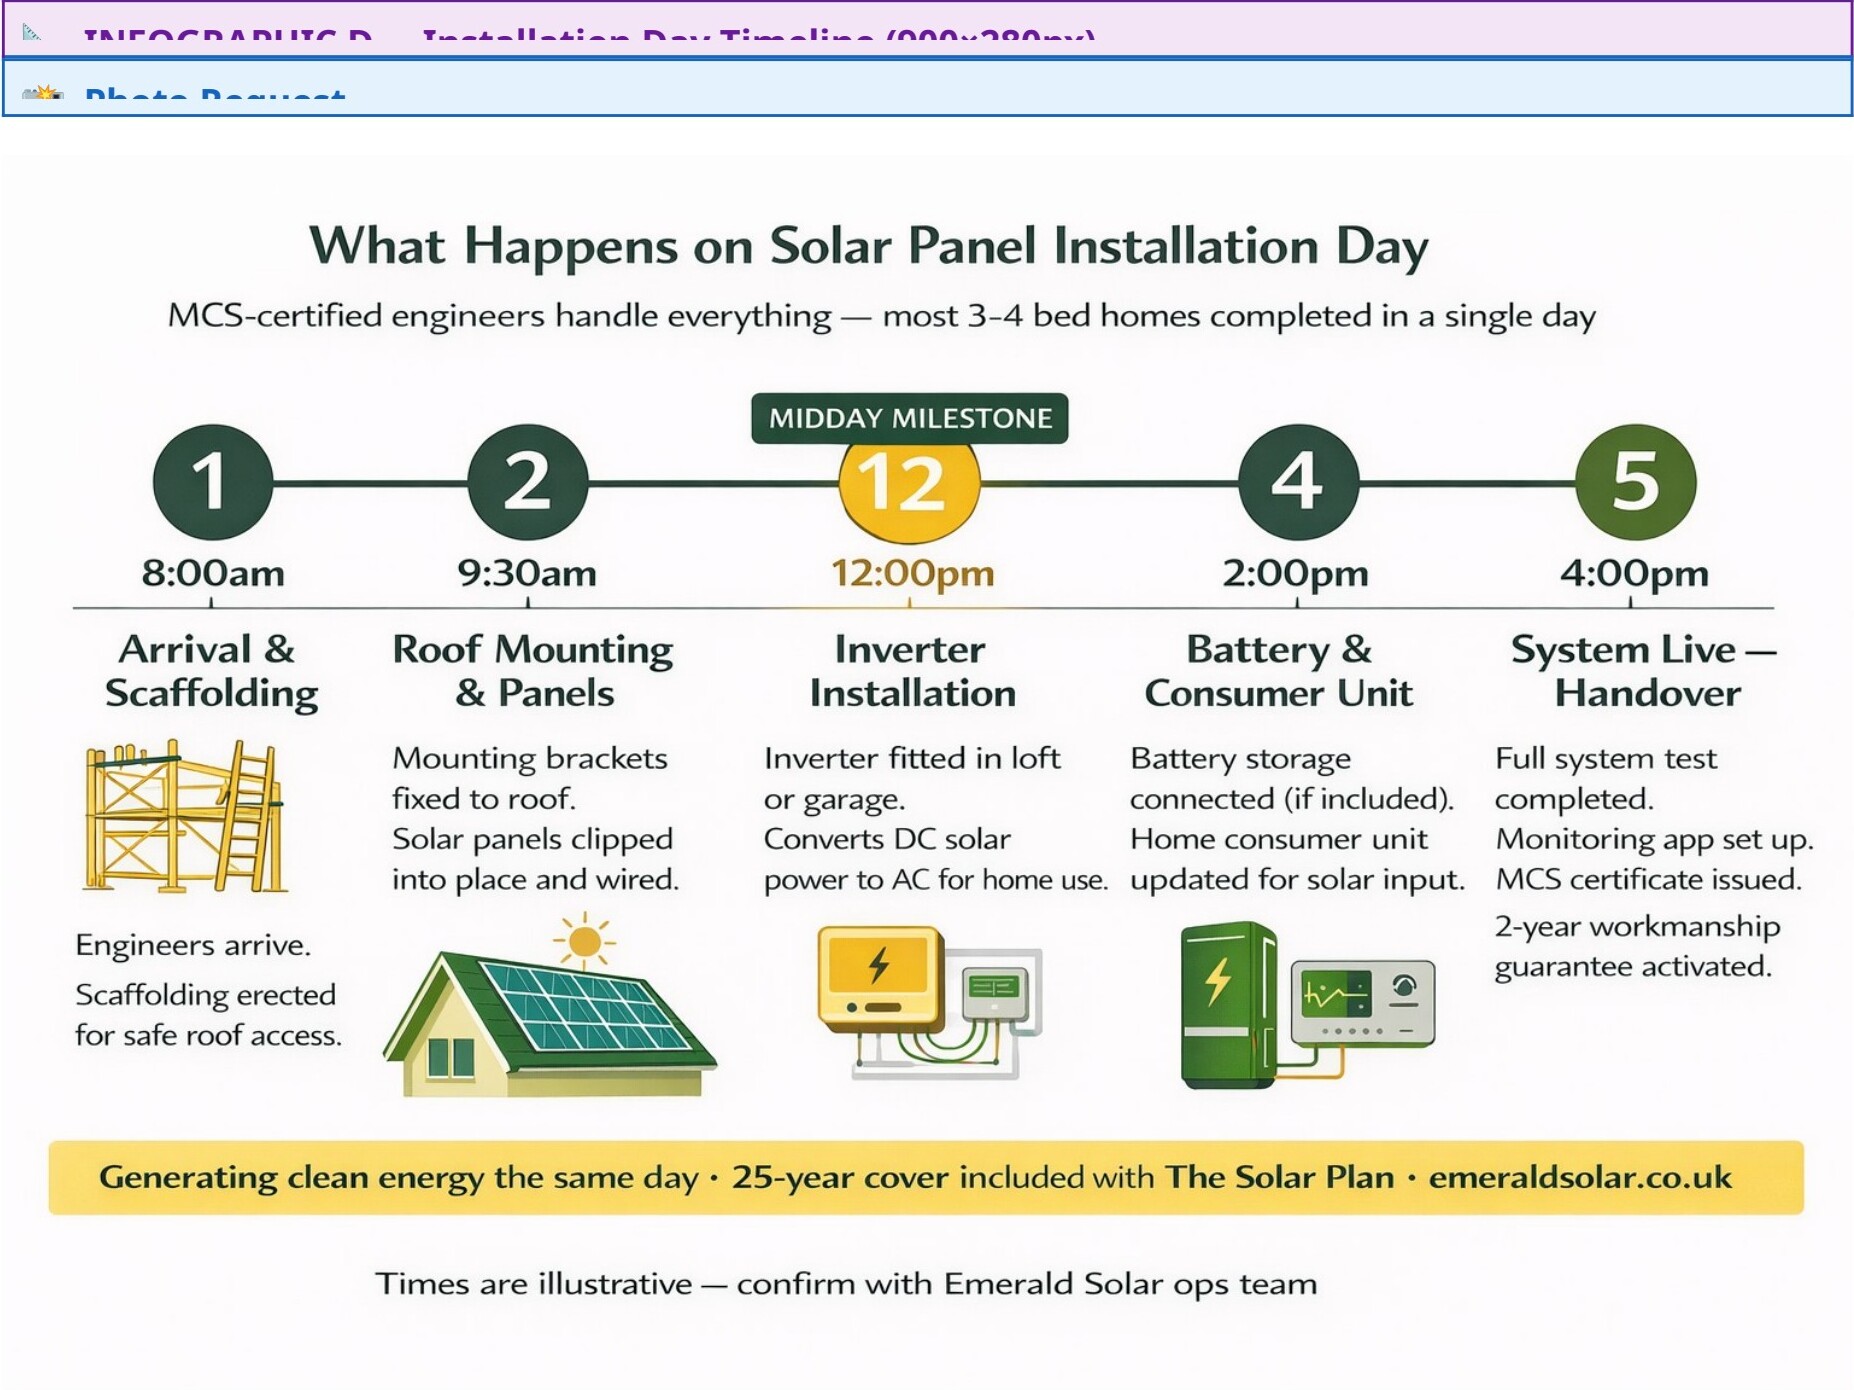
Step 4: Installation Day
On the agreed installation date, two MCS-certified Emerald Solar engineers arrive at your home. For a standard 3–4 bedroom home with a 4kW system, the full installation takes one day. Complex or larger installations may take up to two days. Disruption is minimal, with engineers working primarily on the roof and in the loft or garage.
| Time | What Happens |
|---|---|
| 8:00am | Engineers arrive. Scaffolding erected for safe roof access. |
| 9:30am | Roof brackets and mounting rails fitted. Solar panels installed and wired. |
| 12:00pm | Inverter installed in the loft, garage, or utility room. Converts DC solar power to AC for your home. |
| 2:00pm | Battery storage connected (if included). Consumer unit updated for solar input. |
| 4:00pm | Full system test. Monitoring app set up. Handover walkthrough completed. |
Times are illustrative.
3. How Long Does the Whole Process Take?
| Stage | Handled By | Typical Time |
|---|---|---|
| Survey & System Design | Emerald Solar | 1–2 days after enquiry |
| DNO Notification / Approval | Emerald Solar | 7–20 working days (G98/G99) |
| Finance Approval | Hometree Finance | Same day, instant decision |
| Installation Day | MCS Engineers | 1–2 days |
| System Live & Generating | Automatic | Immediately after activation |
| TOTAL (typical) | Emerald Solar manages all | 4–8 weeks start to finish |
4. What's Included with Emerald Solar's Installation?
Not all solar quotes cover the same things. Here's what Emerald Solar's all-inclusive price covers, and what is frequently left out by cheaper installers:
| ✅ Included with Emerald Solar | ❌ Often Excluded by Other Installers |
|---|---|
| Premium solar panels (top-tier brands) | Scaffolding (often +£400–£800 extra) |
| Inverter and optional battery storage | DNO application fee |
| All labour, scaffolding & fixings | Post-warranty maintenance and repairs |
| DNO application & grid connection | Battery storage (listed as add-on) |
| System monitoring app setup | Monitoring app setup |
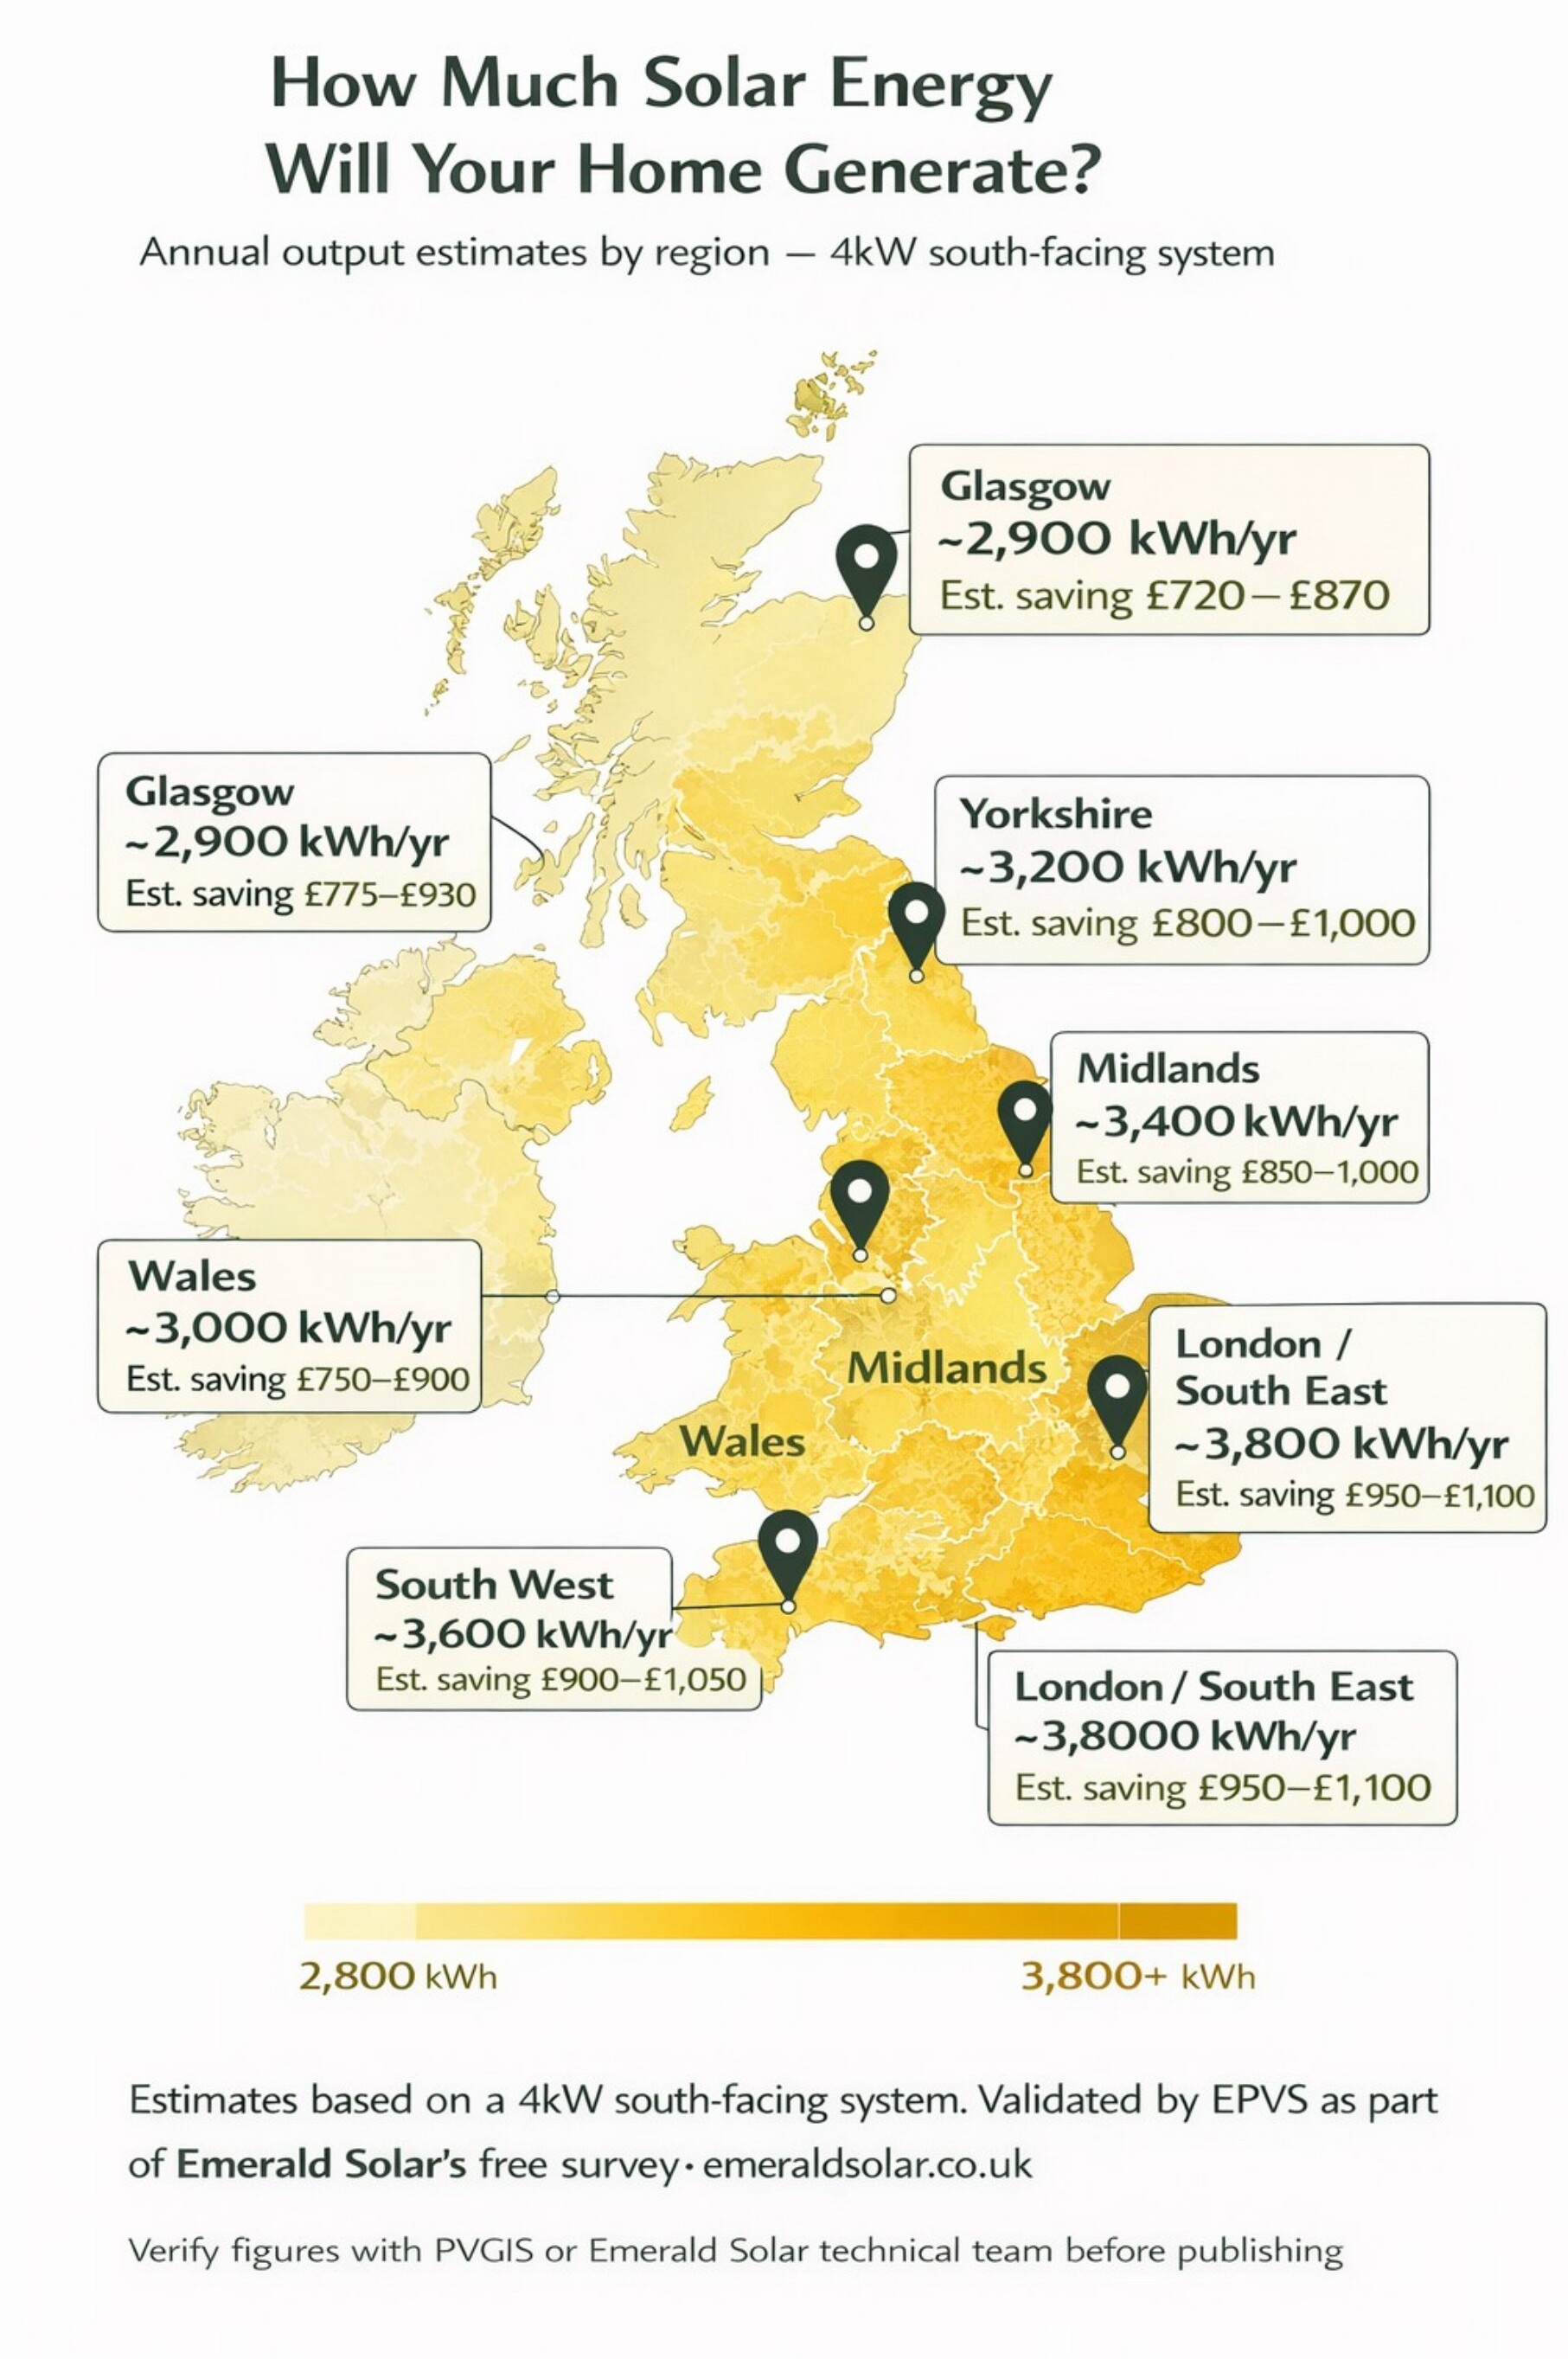
5. How Much Solar Energy Will Your Home Generate?
Annual output depends on where you live, your roof orientation, and shading. The map below shows typical annual generation and savings for a 4kW south-facing system across the UK.
6. Is My Roof Suitable for Solar Panel Installation?
Most UK roofs are suitable for solar. The ideal setup is a south, south-east, or south-west facing roof at a pitch of 20–50°, with minimal shading from chimneys, trees, or neighbouring buildings.
East or west-facing roofs still generate meaningful savings. Emerald Solar's survey calculates your actual output based on your specific roof rather than assuming an ideal orientation. Most standard tile, slate, and flat roofs are fully compatible with solar installation.
Listed buildings and properties in conservation areas may require planning permission. Emerald Solar checks this during the free survey and advises accordingly, with no action required from you at this stage.
7. Ready to Get Started?
Getting a quote is free, takes 2 minutes, and requires no commitment. Emerald Solar designs a system specific to your roof, your energy usage, and your budget, with an EPVS-validated savings estimate included so you know what to expect before you decide anything.
Finance approval is instant and does not affect your credit score during the initial check. If you choose The Solar Plan, you start saving from month one, with no upfront cost and nothing to organise.